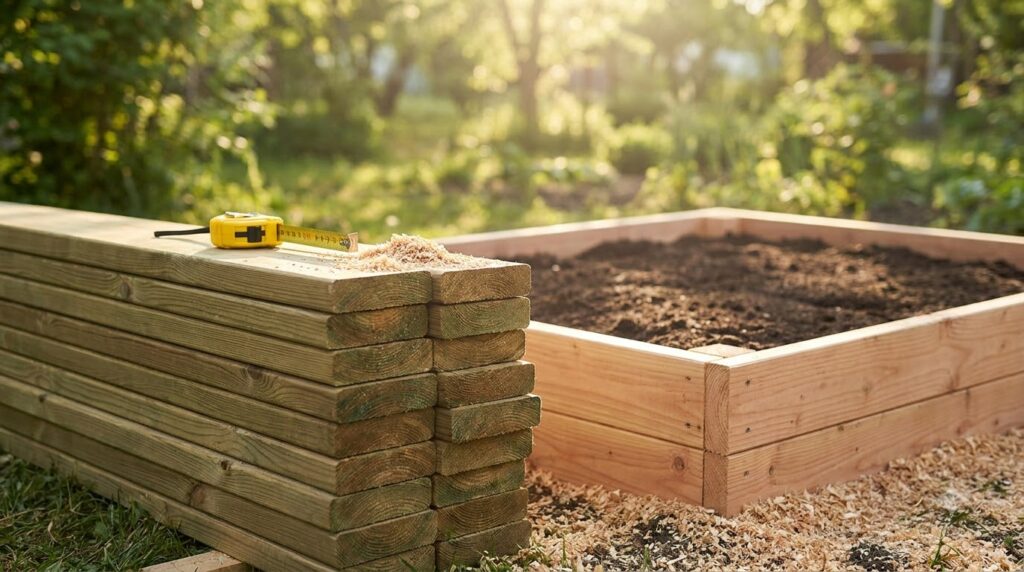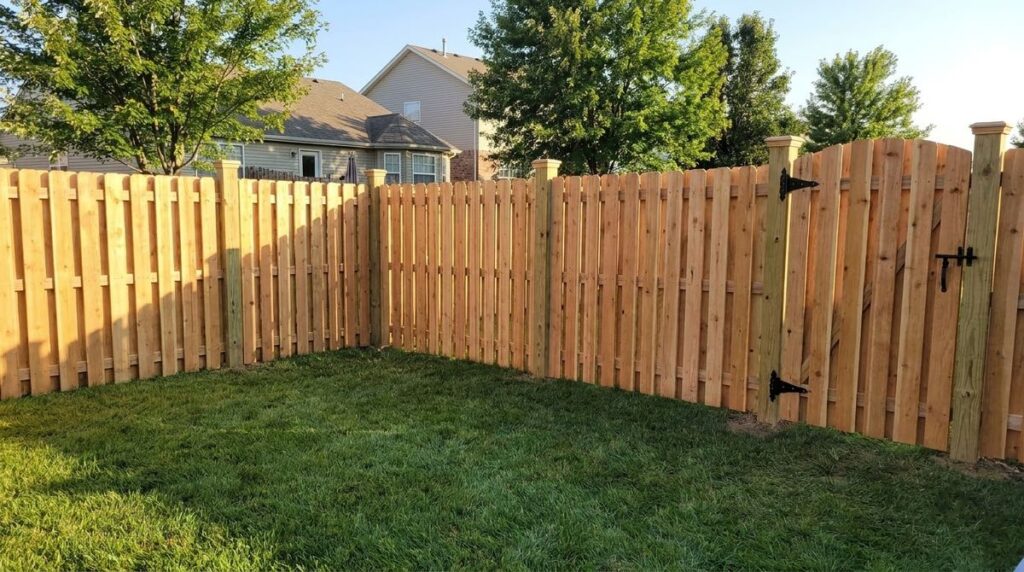
To build a 6-foot wood privacy fence, set 4×4 posts no more than 8 feet apart in holes at least 2 feet deep, or one-third of the post length, then run three 2×4 rails between them and nail 6-foot pickets to the rails with a 1/8-inch gap. The steps below follow manufacturer install sheets, in the order you do the work.
Key takeaways
- Call 811 a few business days before you dig. The service is free, and some utility lines sit only inches below the surface.
- Posts every 6 to 8 feet. Eight feet center to center is the maximum for 8-foot rails; 6 feet is stronger.
- Bury at least 2 feet or one-third of the post, below the frost line, on 4 to 6 inches of gravel. Gate, corner and end posts go 6 inches deeper.
- Wait 24 to 48 hours after pouring standard concrete before you hang rails.
- Leave 1/2 to 3/4 inch on the gate’s latch side and about 1/4 inch on the hinge side.
Here are the tools and materials for one 6-foot component fence (posts, rails and pickets), with what to choose for each. For lower-cost styles, see cheap privacy fence ideas.
| Item | What to choose | Notes |
|---|---|---|
| Posts | 4×4, 8 ft or 10 ft long | Treated posts stamped AWPA Use Category 4A or higher for ground contact |
| Rails | 2×4, 8 ft long, three per section | Treated rails or the same species as the pickets |
| Pickets | 3/4 in x 5-1/2 in x 6 ft dog-ear boards | About 17 per 8-ft section with 1/8-in gaps; treated pickets rated UC3B or higher |
| Post setting | Concrete mix, or gravel and tamping for a dry set | Plus crushed stone for the bottom of every hole |
| Fasteners | 2-1/2 in exterior screws or 8d hot-dip galvanized or stainless nails for rails; 1-1/2 to 2 in exterior nails for pickets | Two per rail end, two per picket per rail |
| Tools | Post-hole digger or auger, circular or miter saw, tape, 4-ft level and post level, mason’s line, stakes | Plus safety glasses and gloves |
Before you dig: property line, permits and 811
Before you dig a single post hole, settle three things: where the line is, what your town allows, and what is buried in the yard. Moving a set post costs far more than a phone call.
- Property line. Millard Lumber’s fence guide says to know exactly where your line is, and if you are unsure, to check it or agree on the fence location with your neighbor. A survey settles it.
- Permit, zoning and HOA. The model building code exempts most fences up to 7 feet from a building permit, but zoning height limits, setbacks and HOA rules are separate. Check with your local building department; height rules are covered in wood privacy fence styles, lumber and height rules.
- 811. Contact 811 or your state 811 center a few business days before digging, and wait until every utility has responded and marked its lines.
How to build a fence, step by step
How to build a fence comes down to ten steps, from string line to stain. The sequence follows a Home Depot install sheet for a 6-foot redwood privacy fence, with Quikrete’s post-setting instructions and UFP’s panel guide where they add detail.
Step 1: Stake the corners and ends
Drive a stake at the start, end and every corner of the fence line. Set the posts in this order, per UFP: end and corner posts first, then gate posts, then line posts, so the fixed points control the layout.
Step 2: Square the line with batter boards and string
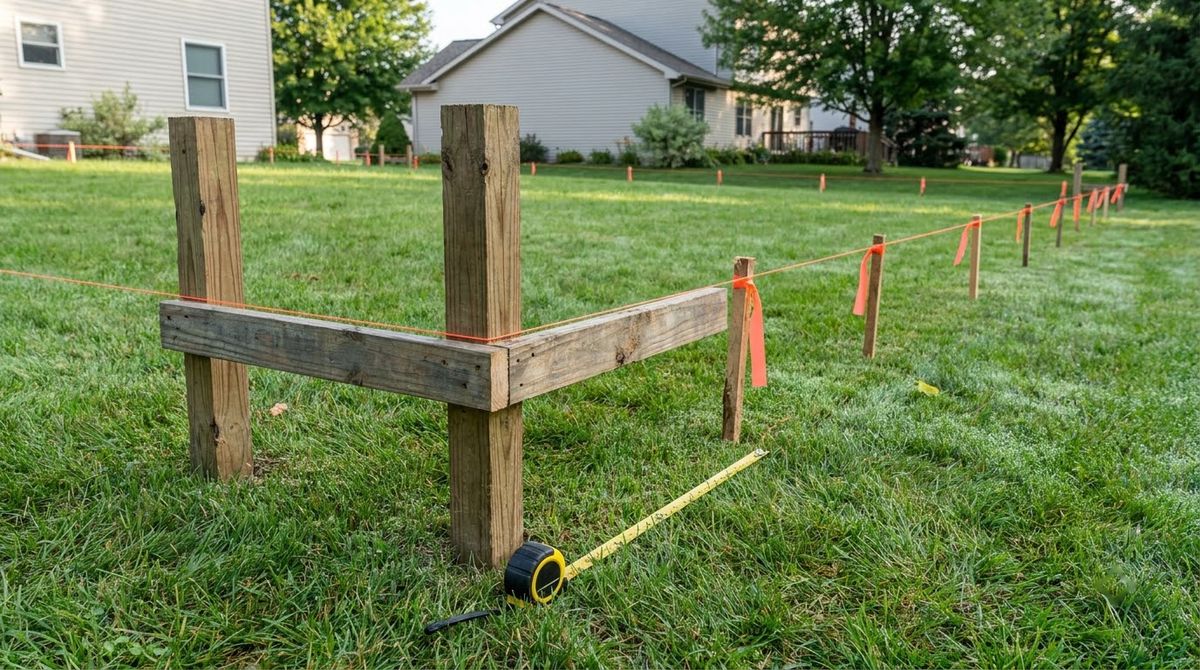
Build a batter board, two stakes and a crosspiece, a couple of feet outside each corner, and stretch a taut mason’s line between them. Square each corner with the 3-4-5 rule: mark 3 feet along one line and 4 feet along the other; the diagonal between the marks is exactly 5 feet when the corner is square.
Step 3: Mark the post spacing
Mark post centers along the string no more than 8 feet apart, so each 8-foot rail ends on a post. The Home Depot sheet recommends 6-foot spacing for maximum strength. Adjust the layout so short sections fall at the ends, not in the middle of a long run.
Step 4: Dig the post holes
Dig each hole at least 24 inches deep, or one-third of the post’s length, and 10 to 12 inches wide, about three times the post’s width per Quikrete. In frost zones, go below the frost line. UFP sets gate, corner and end posts at least 6 inches deeper than line posts.
Do the math before you buy posts. An 8-foot post buried 2 feet leaves 6 feet above grade, just enough for 6-foot pickets. Burying one-third of the post means a 10-foot post: about 40 inches down and 80 inches up, trimmed to height later.
Step 5: Add gravel, then set and brace each post
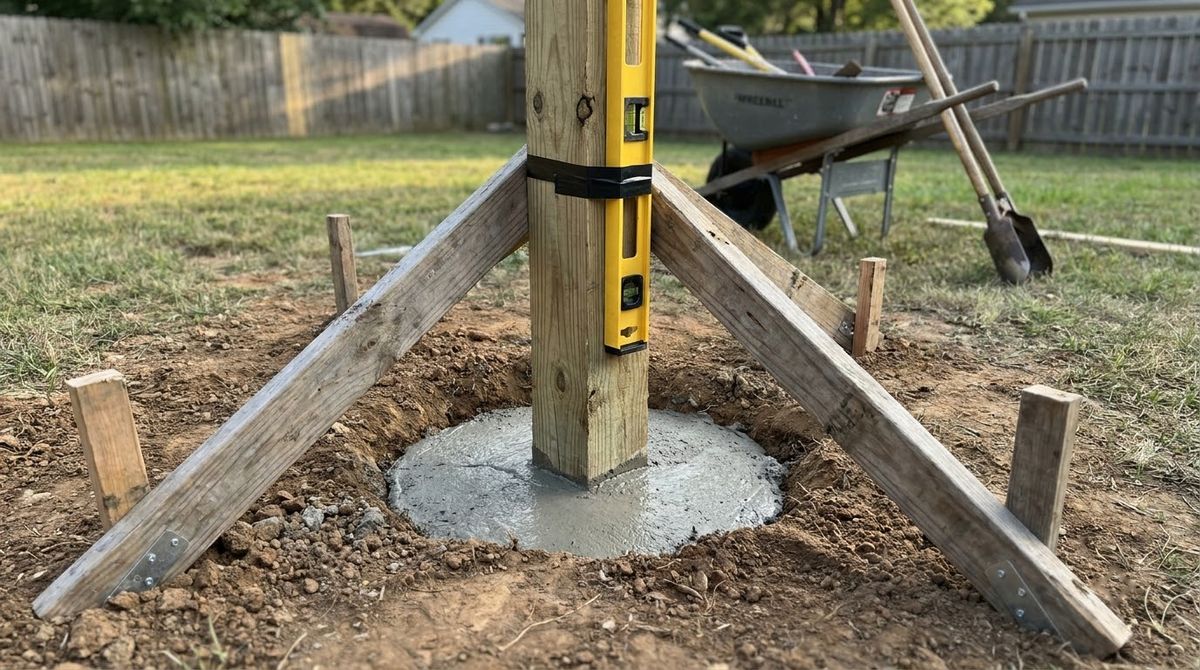
Put about 4 inches of gravel in the bottom of each hole; Quikrete and UFP call for 6 inches. Set the post, line its face up with the string, and check plumb on two adjacent sides. Hold it there with two scrap 2×4 braces staked to the ground, then fill with concrete or tamped gravel.
Step 6: Let the posts cure
Give standard concrete at least 24 to 48 hours before you attach rails, per the Home Depot sheet; Millard Lumber suggests letting posts settle for several days. Fast-setting mix sets in 20 to 40 minutes, but Quikrete still says to wait 4 hours before heavy loads, and longer below 72°F.
Step 7: Hang three rails
A 6-foot fence takes three 2×4 rails per section to keep pickets from warping: the top rail about 6 inches below the top of the pickets, the bottom rail about 6 inches above the ground, and the middle rail centered between them.
- Fasten each rail end with two 2-1/2-inch exterior screws or two 8d galvanized nails.
- Butt rail joints tightly and center them on a post.
- Stagger the joints so no two rails break on the same post at the same height.
Step 8: Nail on the pickets
Tack a straight 2×4 along the bottom rail with its top edge at least 1 inch above the ground; the pickets sit on it, which keeps them off wet soil. Plumb the first picket at the end post, then nail every picket with two nails per rail, using a 1/8-inch spacer between boards.
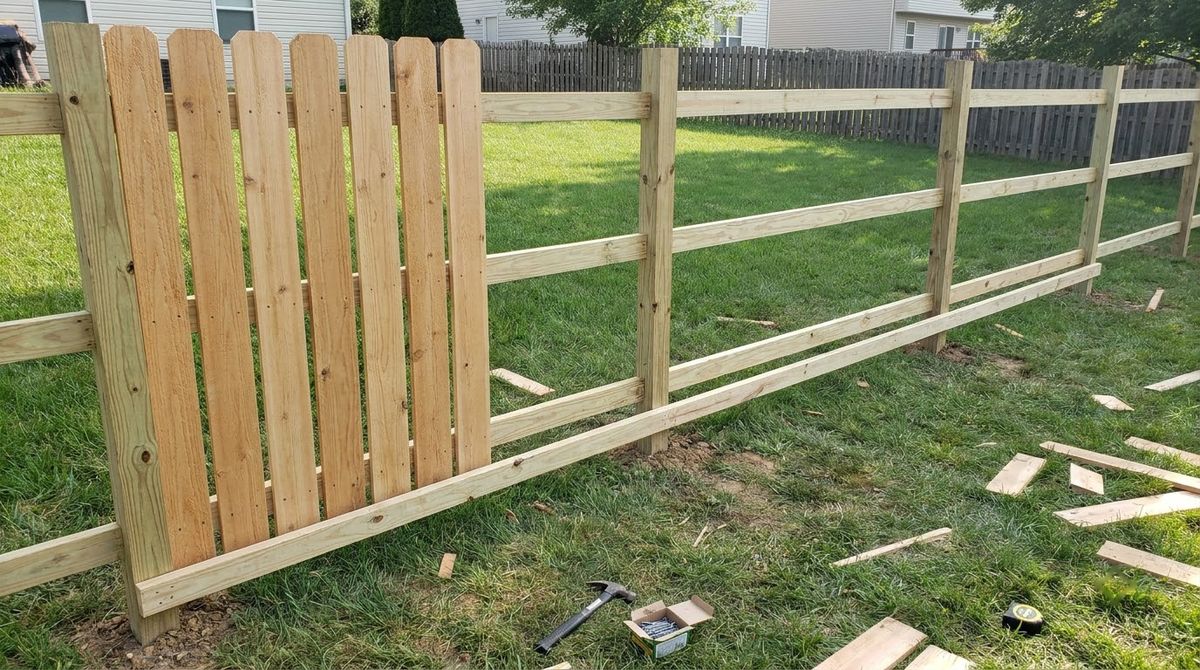
Near the end of each section, spread the gap across the last four or five pickets so the final board lands neatly on the post instead of leaving a thin sliver. Then pull the temporary 2×4.
Step 9: Build and hang the gate
Build the gate frame once the gate posts have cured, and size it to the measured opening, not the planned one. The clearances, bracing and hanging order are in the gate section below.
Step 10: Trim posts, cap them and finish the wood
Cut post tops level with or just above the pickets and add post caps. Millard Lumber notes that post tops should be rounded, capped or slanted to shed water. Finish with a UV-protective stain or sealer; Western Red Cedar Lumber Association suggests transparent or semitransparent stain for a natural look.
Concrete or gravel for fence posts
Concrete or gravel for fence posts is the one choice every fence builder argues about. Both install sheets allow either: the Home Depot sheet lists concrete or gravel and tamping for a dry set, and Millard Lumber says to pack posts with dirt or concrete, with gravel at the bottom in either case.
- Concrete is what the Home Depot gate sheet calls for on gate posts, which carry extra stress. Use it for gate, corner and end posts.
- Crown or bury the top. The Home Depot and Millard sheets slope the concrete up and away from the post to shed water. Quikrete instead fills to 3 to 4 inches below grade and tops the hole with soil.
- Tamped gravel or soil skips the concrete. Millard Lumber says to tamp it thoroughly around the post without knocking the post out of plumb.
Either way, the weak point is the same. Oregon State University’s long-term post study found the most vulnerable section runs from just above the soil to some distance below it, which is why posts must carry a ground-contact treatment rating.
Board-on-board pickets: how to overlap them
Board-on-board pickets close the gaps that open as single-layer boards shrink. You nail one layer with gaps narrower than a board, then center a second layer over those gaps on the same rails.
Choose the gap so each edge overlaps. With 5-1/2-inch boards and a 3-1/2-inch gap, each second-layer board covers its neighbors by 1 inch per side. That doubles the board count: about 21 boards per 8-foot section instead of 17. Style trade-offs are covered in wood privacy fence styles compared.
How to build a privacy fence gate
A privacy fence gate fails when its posts lean or its frame racks. The Home Depot gate sheet breaks the job into five steps: set the gate posts, build the frame, add the boards, hang the gate and install the latch.
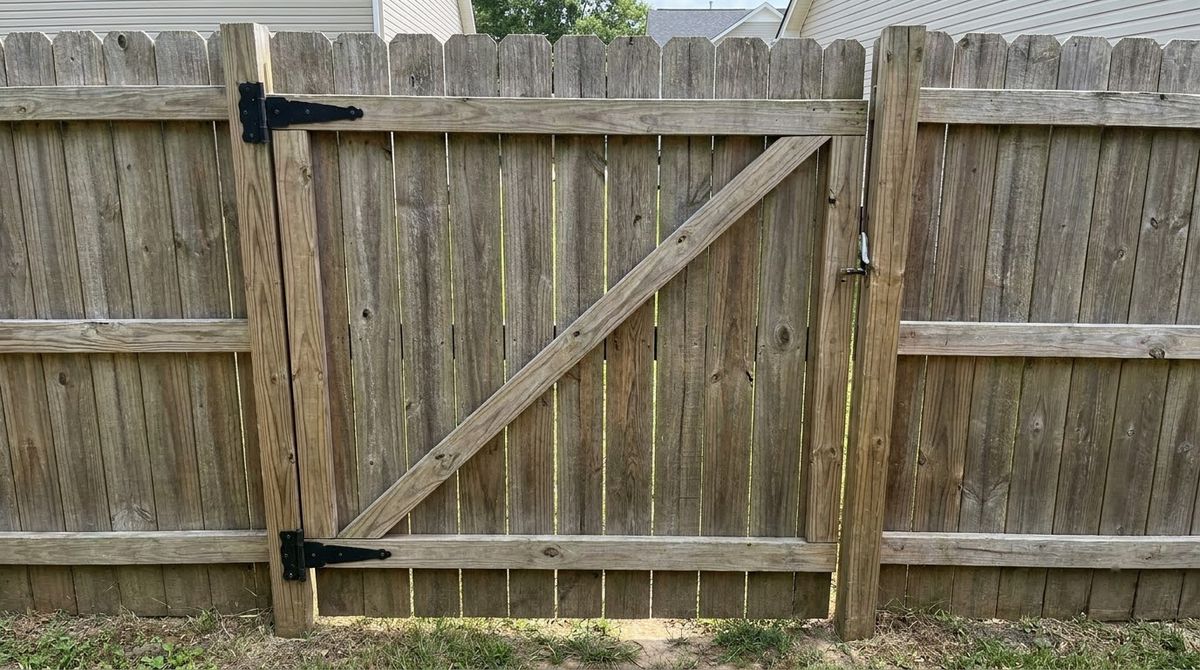
- Posts. Set gate posts deeper than line posts, about one-third of their length, in concrete, plumb, with inside faces parallel.
- Clearance. With 2×4 framing on 4×4 posts, leave 1/2 to 3/4 inch at the latch post; about 1/4 inch usually works on the hinge side, depending on hardware.
- Frame. Assemble with exterior screws and glue, and check square: the frame is a true rectangle when both diagonals are equal.
- Brace. Run the 2×4 brace from the bottom hinge corner to the top latch corner.
- Hang. Add boards from the hinge side, prop the gate on blocks, mark the hinge holes, then use slightly longer screws for the latch.
Common mistakes when building a fence
Most fence problems come from the posts, not the pickets:
- Digging before the 811 marks are in, or inside the flagged area with a power auger.
- Buying 8-foot posts and burying a third, which leaves them too short for 6-foot pickets.
- Spacing posts wider than 8 feet, so rails no longer end on a post.
- Hanging rails on green concrete before the 24 to 48 hours are up.
- Setting pickets on the soil. Keep them at least 1 inch up.
- Lining up rail joints on the same post, which creates a hinge in the fence line.
- Bracing a gate the wrong way. A brace that does not run from the low hinge corner up to the latch side lets the gate sag.
Safety and when to hire a pro
Safety on a fence build starts underground. 811 notes that shovels are the second most common tool involved when buried utilities are damaged, after backhoes, and that every digging project needs a locate request, whatever its depth.
- Hand-dig near any paint or flag mark, and move the post if a line runs through the hole.
- Wear safety glasses and gloves for sawing, nailing and mixing concrete, as both install sheets list.
- Brace every post until the concrete sets, so a leaning post does not pull the line or fall on someone.
- Get help with long runs: holding a post plumb while someone else pours is a two-person job.
Hire a fence contractor when the line runs across a steep slope, through rock or roots, or along a disputed boundary, or when local rules call for an engineered or inspected fence. To weigh the bill, see privacy fence cost per foot, DIY vs pro.
Frequently asked questions
How deep should fence posts be for a 6-foot fence?
At least 2 feet, or one-third of the post’s length, and below your local frost line, with 4 to 6 inches of gravel underneath. An 8-foot post buried 2 feet leaves exactly 6 feet above grade. Gate, corner and end posts should go about 6 inches deeper than line posts.
Should fence posts be set in concrete or gravel?
Both methods appear in install guides. Concrete is the safer choice for gate, corner and end posts, which carry the most stress. Line posts can be set in gravel or soil tamped thoroughly around the post. Either way, put gravel in the bottom of the hole, keep the post plumb, and shed water away from it.
How long should concrete cure before attaching fence rails?
At least 24 to 48 hours for standard concrete, per a Home Depot fence install sheet, and Millard Lumber suggests several days. Fast-setting mix sets in 20 to 40 minutes, but Quikrete says to wait 4 hours before heavy loads and longer when it is below 72°F. Keep posts braced until then.
How much gap should a wood fence gate have?
With a 2×4 frame on 4×4 posts, leave 1/2 to 3/4 inch between the gate and the latch post. On the hinge side, about 1/4 inch is usually enough, but follow your hinge maker’s instructions. Brace the frame from the bottom hinge corner to the top latch corner so it does not sag.
Do I need a permit to build a fence?
Sometimes. The model International Residential Code exempts fences up to 7 feet tall from a building permit, but towns such as Darien, Illinois, still require a fence permit and cap rear-yard fences at 6 feet. HOA rules may add more. Check with your local building department before you dig.
Sources
- The Home Depot, Step-by-Step Instructions: Building a 6-Foot Redwood Privacy Fence (product install sheet, checked October 2026).
- The Home Depot, Build and hang the gate (product install sheet, checked October 2026).
- The Quikrete Companies, Setting Posts project instructions (checked October 2026).
- Universal Forest Products, 6×6 Board-on-Board Panel Installation Instructions (2019).
- American Wood Protection Association, Preserved Wood Use Categories, residential infographic (2021).
- Common Ground Alliance, 811 Before You Dig (checked October 2026).
- Also cited: Millard Lumber, Building Wood Fences (PDF guide); Oregon State University post-farm study; City of Darien, Illinois, Residential Fence Information; Western Red Cedar Lumber Association, Fence Construction; International Code Council, 2021 IRC Section R105.2.