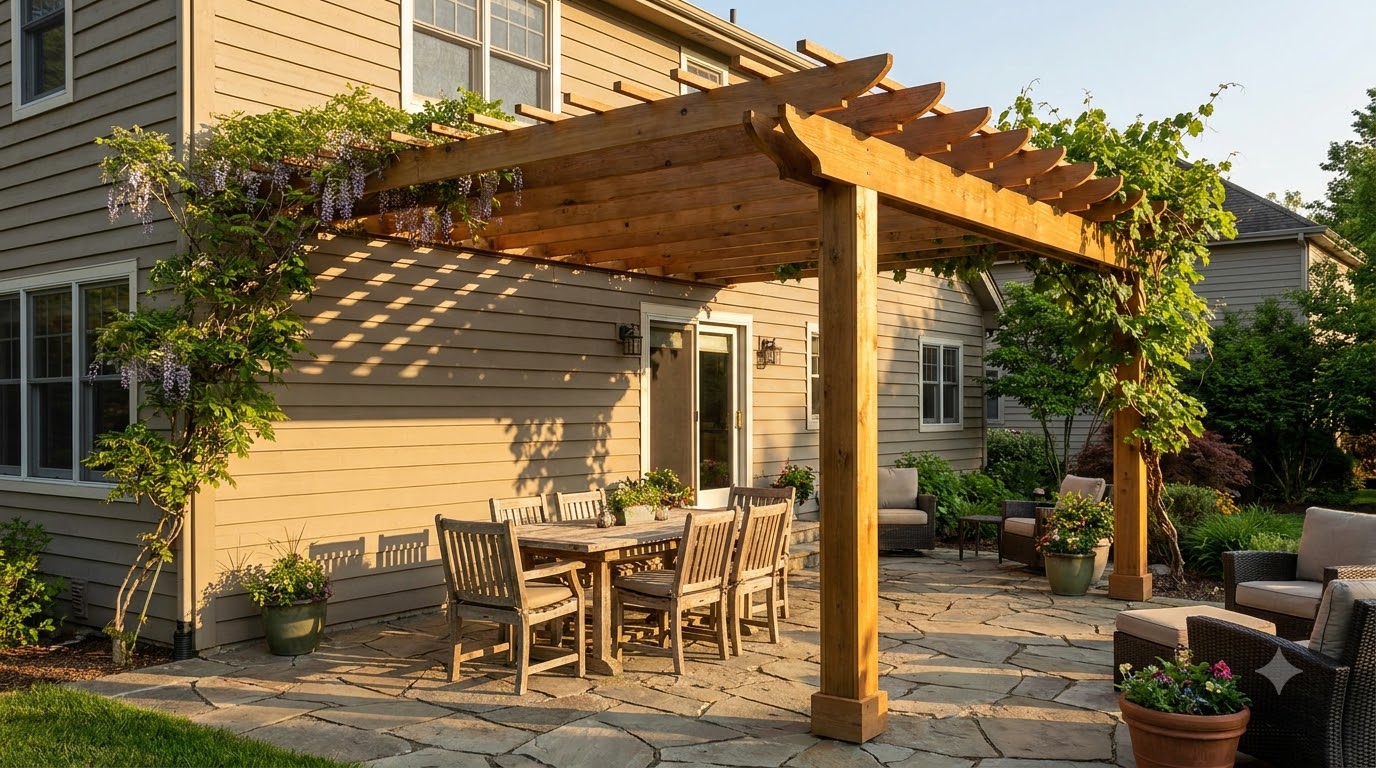
To attach a pergola to a house, you bolt a ledger board through the siding into the rim joist or wall studs, flash it, and hang the pergola’s rafters off it — with two posts carrying the outer edge. The carpentry is straightforward. The part that decides whether this ages well for twenty years or rots your wall in three is the flashing, and it is the step most guides skip in a sentence.
Key takeaways
- Bolts go into framing — rim joist or studs. Siding and sheathing hold nothing.
- Flashing is not optional. Z-flashing tucked under the siding, folded over the ledger, sheds the water the ledger now catches.
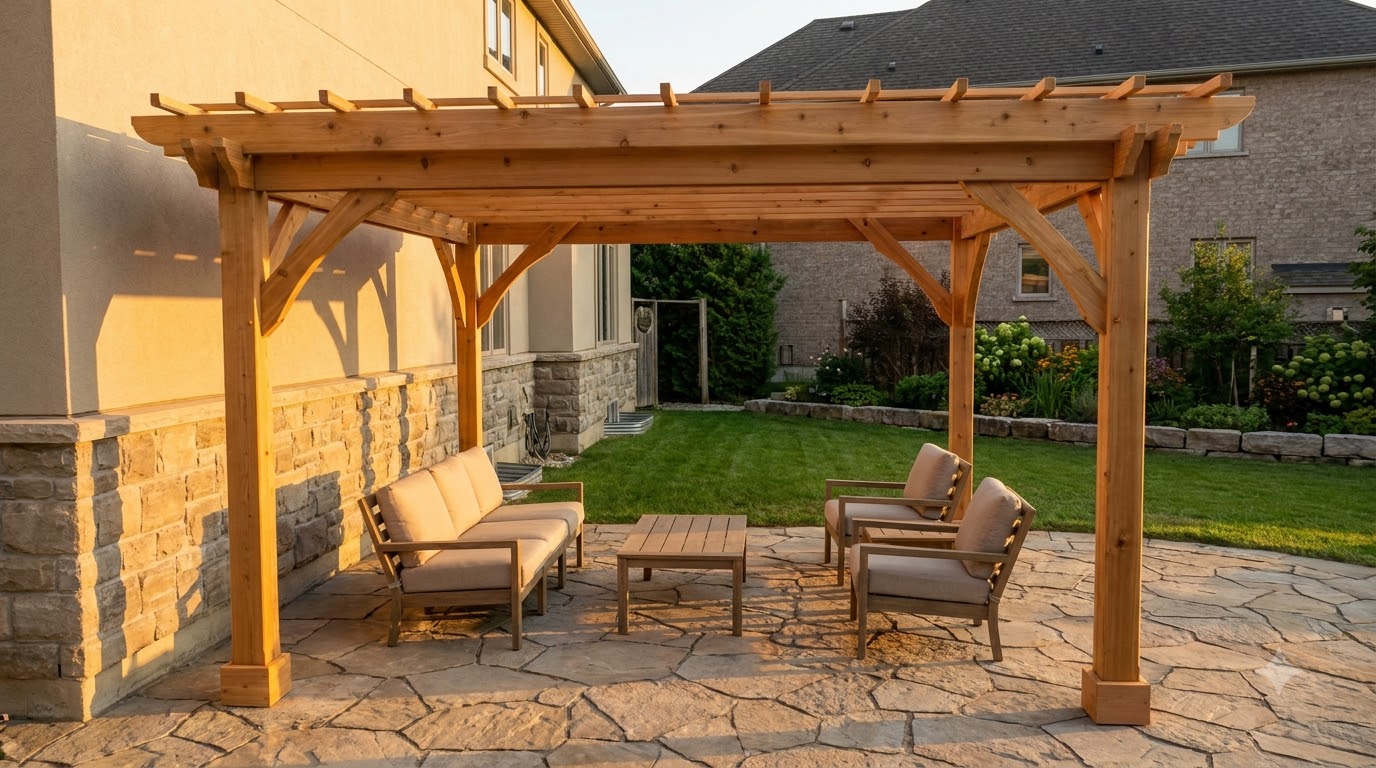
- Two posts, not four — that’s the payoff: more usable patio, an integrated look.
- Brick, stucco, and roofs are the hard modes. Each has a correct method, and each punishes improvisation.
- Freestanding a few inches off the wall gets you 90% of the look with 0% of the water risk — genuinely the right call in many houses.
Where to attach a pergola to a house — and how it carries load
The ledger detail here is the same one used for deck ledgers, and it is worth borrowing their homework: the DCA 6 deck construction guide that inspectors reference devotes pages to ledger attachment and flashing precisely because it is where water damage starts.
An attached pergola is half a structure: the house takes one long edge, two posts take the other. The load path on the house side runs rafter → ledger board → bolts → rim joist or studs → foundation. Every one of those links must be real framing. The single most common failure is bolting into siding and sheathing — materials designed to keep weather out, not to carry a beam full of snow in a gust of wind.
The outer edge is ordinary post work: two posts on footings, or on a deck where the load reaches structure below — the same rules as putting a pergola on a deck.
Step 1: find the framing and set the height
- Locate the rim joist. The band of framing at floor level is the ideal anchor — it is continuous and deep. Studs work too; find them with a stud finder and confirm with a small pilot hole.
- Set the ledger height so you keep 7–8 ft of headroom under the beams, and so the rafters clear doors, windows, and any downspout.
- Snap a level line. A ledger that is off by a half inch over twelve feet shows in every rafter afterward.
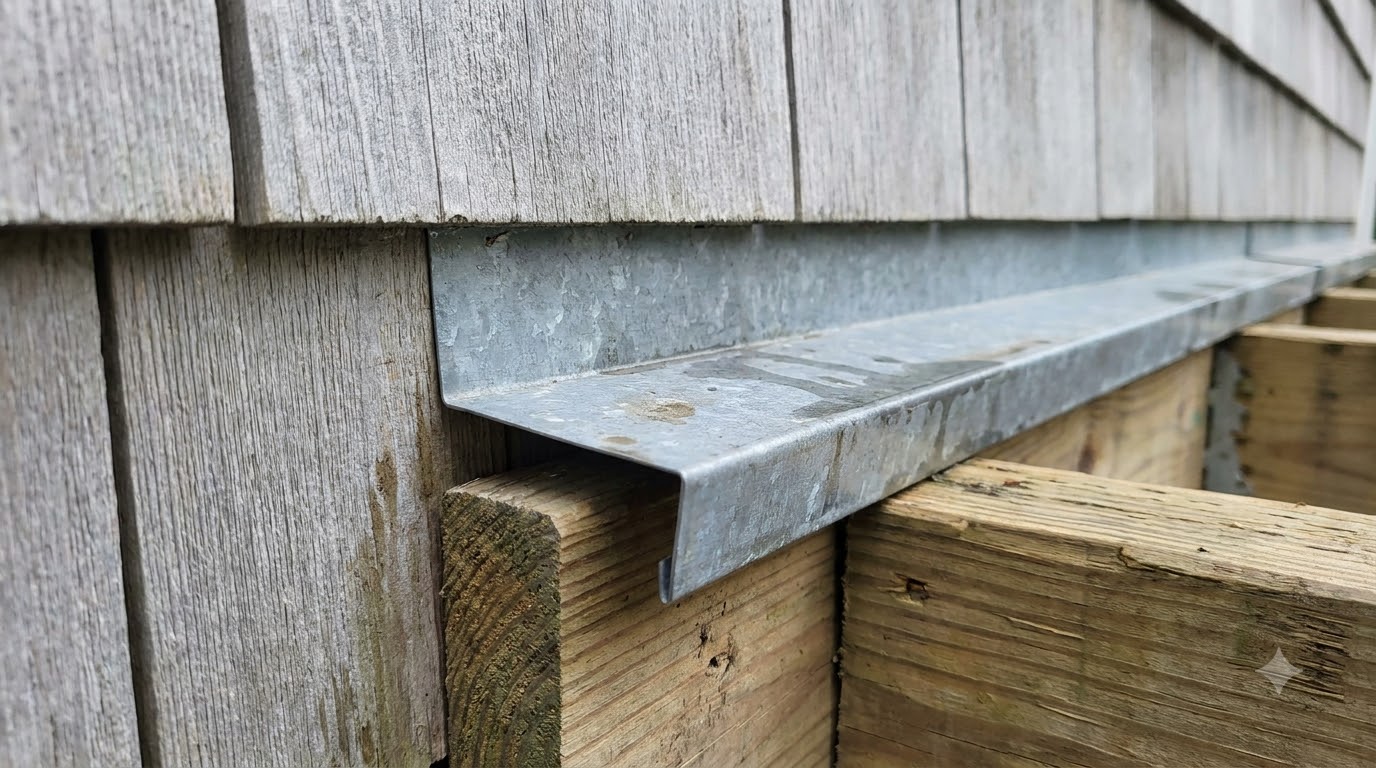
Step 2: flashing — the step that decides everything
This is the step that separates a pergola from a future repair bill. On lap or vinyl siding:
- Cut back the siding to expose sheathing in a band slightly taller than the ledger — the ledger should sit against sheathing, not on top of siding.
- Install Z-flashing: its top leg slides up under the siding above, the middle sits behind the ledger’s top edge, and the bottom leg folds out over the ledger. Water travels down the wall, hits the flashing, and gets thrown outward instead of sitting on the ledger.
- Seal the fastener penetrations and any cut edges of housewrap as you go — the flashing sheds bulk water, but every bolt hole is still a hole through your weather barrier.
- Never rely on caulk alone. Caulk is a helper and it fails; flashing is geometry and it doesn’t.
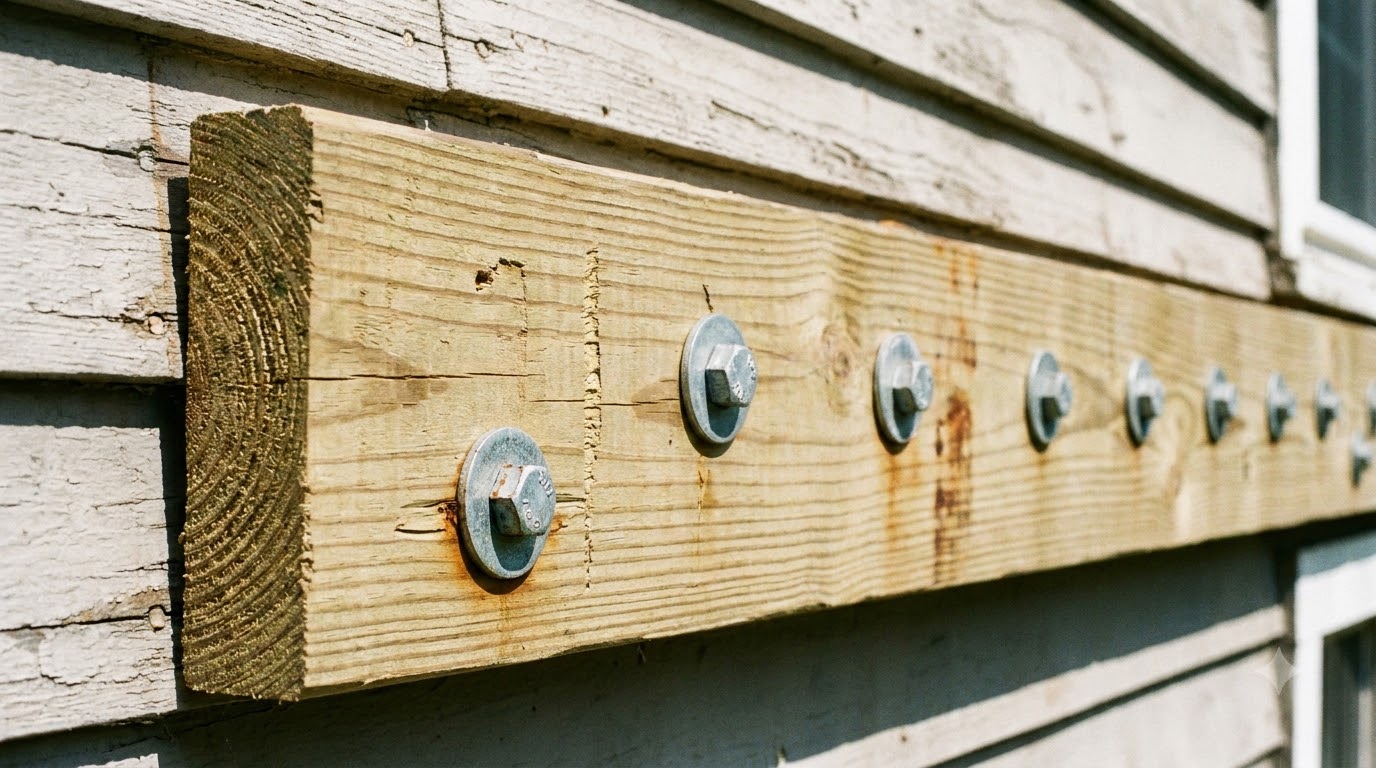
Step 3: bolt the ledger
- Use structural lag screws or through-bolts rated for exterior use — galvanized or stainless, never deck screws.
- Stagger fasteners in two rows, top and bottom, so the ledger cannot rotate under load.
- Follow spacing from your kit or local code — and keep bolts back from the ledger’s ends so the board doesn’t split.
- Washers on everything. They spread the clamping force instead of letting heads sink into the wood.
Wall type changes everything
| Wall | What to do | Difficulty |
|---|---|---|
| Lap / vinyl siding over wood framing | Standard ledger + Z-flashing into rim joist or studs | DIY-friendly |
| Brick veneer | Veneer isn’t structural — fasteners must reach framing behind with sleeves, or go freestanding | Hard |
| Stucco | Every penetration must be sealed into the drainage plane; easy to breach invisibly | Hard |
| Solid masonry / block | Masonry anchors into solid material — strong, but no room for error in placement | Moderate–hard |
| Roof edge (no usable wall) | Roof-mount brackets into rafters, flashed at each penetration | Pro territory |
Mounting to the roof instead
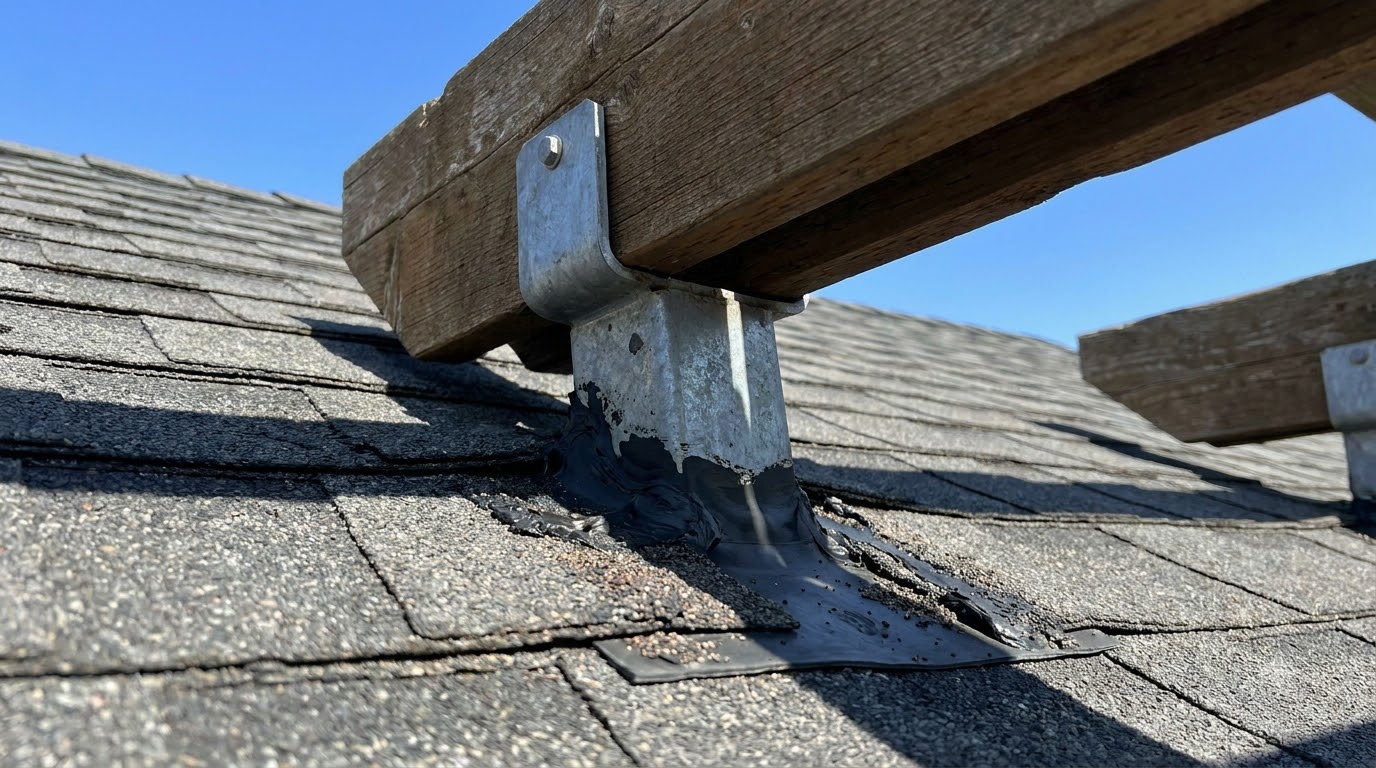
When the wall below is brick, mostly glass, or simply too low, purpose-made roof-mount brackets reach through the roofing into rafters or added blocking and lift the pergola beam above the roof line. Done right — blocking sized correctly, boot flashing sealed into the shingle courses — it is a clean solution. Done casually, you have punched holes in a roof, and the leak shows up on a ceiling months later. This is the point where hiring a roofer for the penetrations is cheap insurance.
When NOT to attach — and what to do instead
Plenty of good pergolas never touch the house. Go freestanding when:
- The wall is brick veneer or stucco and you are not hiring a pro.
- You rent, or the HOA restricts changes to the house envelope.
- The wall is full of windows, vents, or a gas meter where the ledger needs to run.
- Your area sees heavy snow or high wind and you would rather not tie that load into the wall.
The move: set a four-post pergola 2–4 inches off the wall. From the patio it reads as attached, the gap lets the wall drain and dry, and you never cut into siding at all. It costs two extra posts and footings — less than one wall repair.
Permits and the paperwork
Attaching to the house pushes a pergola into permit territory in most jurisdictions — it is now part of the building, and inspectors care about ledger attachment for exactly the reasons above. Check the building department and the HOA before you buy lumber; the same rules that govern attached versus freestanding structures generally decide whether you need a drawing, an inspection, or nothing at all.
Mistakes that lead to wall repairs
- No flashing. The number one cause of rotted rim joists behind attached structures.
- Bolting through siding into sheathing. Feels solid on install day; isn’t.
- Ledger on top of siding. Traps water in the lap and prevents flashing from working.
- Anchoring to brick veneer as if it were structural. Veneer is a rain screen, not a beam seat.
- Caulk instead of geometry. Every caulk joint outdoors is on a countdown.
- Skipping the permit on an attached structure — discovered at resale, when it is most expensive.
Frequently asked questions
How do you attach a pergola to a house?
With a ledger board bolted through the siding and sheathing into the house’s rim joist or wall studs, using structural lag screws or through-bolts — plus metal flashing tucked under the siding above it. The pergola’s rafters then hang off that ledger, and posts carry the outer edge.
Do you need flashing behind a pergola ledger?
Yes. A ledger creates a horizontal ledge against the wall that catches water. Z-flashing tucked up under the siding and folded over the ledger’s top edge sends that water back out. Skipping it is the classic path to a rotted rim joist.
Can you attach a pergola to a roof instead of a wall?
Yes, with purpose-made roof-mount brackets that reach through the roofing into rafters or blocking and are flashed at the penetration. It is the standard fix when the wall below is brick, stucco, or full of windows — but each penetration is a potential leak, so it is a good place to hire a pro.
Where do the ledger bolts go?
Into solid framing — the rim joist band around the floor, or wall studs — never into siding or sheathing alone. Locate framing with a stud finder, confirm with a pilot hole, and stagger bolts in two rows so the ledger cannot rotate.
Is an attached pergola cheaper than freestanding?
Slightly — two posts instead of four, two fewer footings. But you add ledger hardware, flashing, and usually a permit review, so the saving is small. Choose attached for the integrated look and floor space, not to save money.
Can I attach a pergola to a brick or stucco wall?
Brick veneer is not structural, so bolts must reach the framing behind it with proper sleeves, and stucco must be sealed carefully at every penetration. Both are doable but unforgiving — many builders simply set the pergola freestanding a few inches off the wall instead.