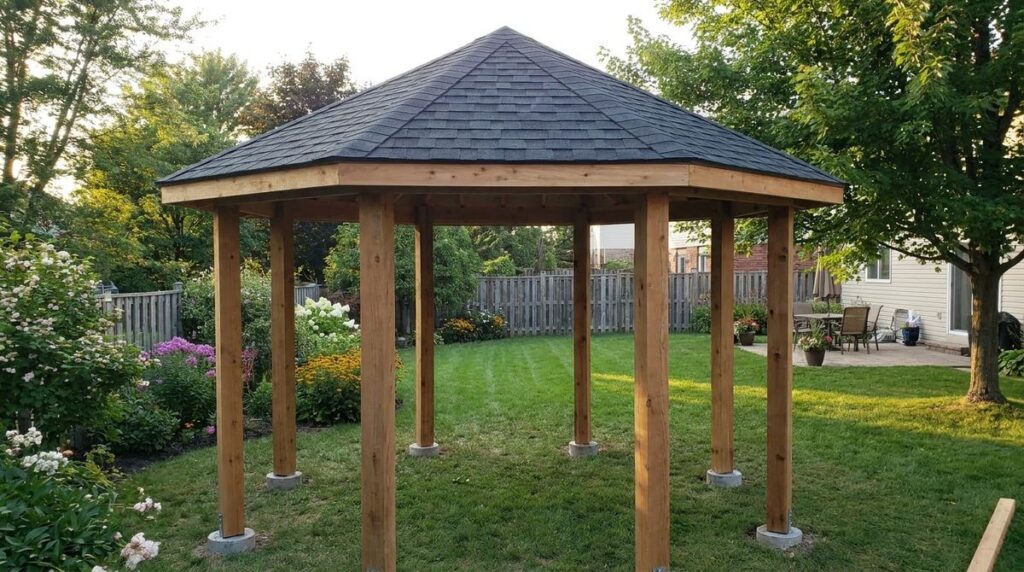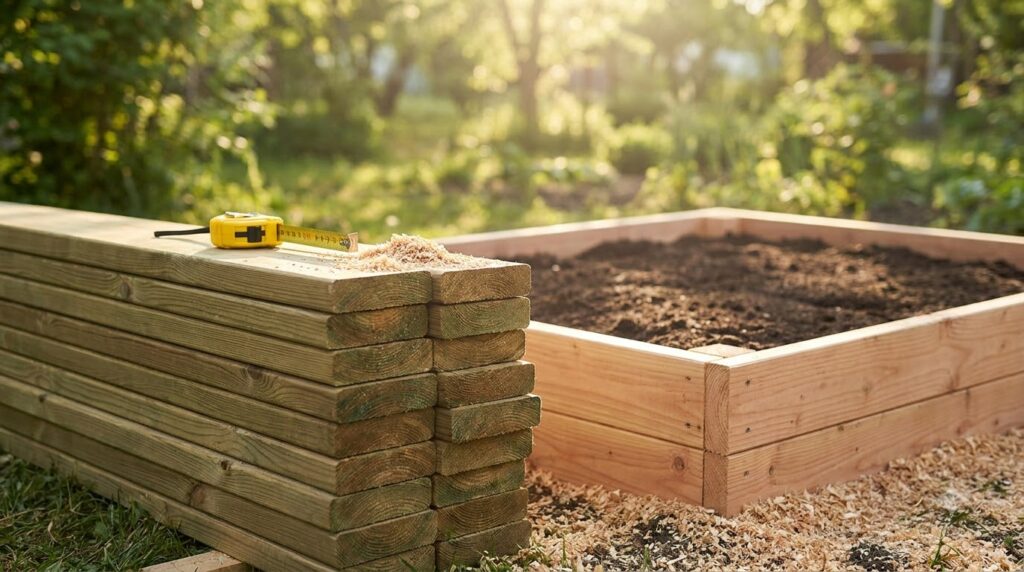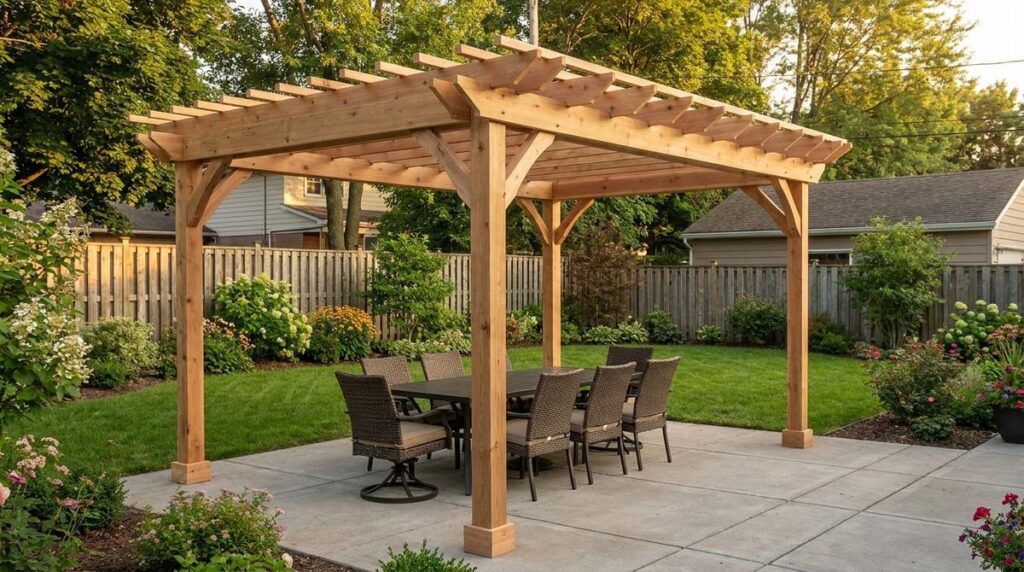
To build a pergola, you set four or more posts on concrete footings at least 12 inches below undisturbed soil, bolt beams across the post tops, and lay rafters over the beams at 12 to 24 inches on center. The carpentry is basic; sizing is what matters, and the table below shows it.
Key takeaways
- Footings go at least 12 inches into undisturbed soil (IRC R403.1.4, as quoted by Phoenix) and below your local frost depth in cold climates.
- Size drives everything. In one city standard, a 10×10 pergola gets by with 4×6 beams; a 4-post 16×20 needs 4×12 beams and 18-inch footings.
- Add posts instead of beam depth. Six posts on a 16×20 shrink the beam back to a 4×6.
- Brace every corner. Standard plans show 4×4 knee braces at 45 degrees, at least 24 inches long.
- Call 811 a few business days before digging. It is free.
Here is the shopping list for a freestanding wood pergola, with what to pick and why.
| Item | What to choose | Notes |
|---|---|---|
| Posts | 4×4 minimum; 6×6 for freestanding builds | Pressure-treated or naturally durable wood; grade-marked |
| Beams | Solid 4× lumber sized from the table below | City plans call for Douglas fir-larch No. 2 or better |
| Rafters | 2×6 or 2×8 for most backyard spans | Spacing of 12–24 in on center sets shade and size |
| Top slats | Up to 2×4, laid across rafters | Lattice standards cap slats at 2×4, about 50% open |
| Footings | Concrete, 2,000–2,500 psi minimum | 12–18 in square for typical sizes; see table |
| Hardware | Raised post bases, post caps or straps, 5/8-in bolts, rafter ties | Galvanized or corrosion-resistant, listed products |
| Tools | Post-hole digger or auger, circular saw, drill, 4-ft level, string, tape, ladders, clamps | Clamps hold beams and braces while you drill |
Pergola size table: footprints, posts, beams and rafters
A pergola size table turns the footprint you want into post count, beam size, rafter size, and footing size. The numbers below come from the City of Escondido, California, lattice patio cover standard (Guideline 8A), a real permit document with span tables for open wood covers.
| Roof footprint | Posts (on-center layout) | Rafters | Beam | Footing | What fits under it |
|---|---|---|---|---|---|
| 10×10 ft (100 sq ft) | 4 posts, about 8×8 ft | 8-ft span: 2×4 at 16 in or 2×6 at 24 in | 4×6 | 12 in square | Bistro set or two loungers; too tight for a 6-seat table |
| 12×12 ft (144 sq ft) | 4 posts, about 10×10 ft | 10-ft span: 2×6 at any spacing to 32 in | 4×6 | 12 in square | 4-seat dining set or a sofa grouping |
| 12×16 ft (192 sq ft) | 4 posts, about 10×14 ft; or 6 posts at 7 ft | 10-ft span: 2×6 | 4×8 (4 posts) or 4×6 (6 posts) | 14 in (4 posts) or 12 in (6 posts) | 6-seat table with chair room |
| 16×20 ft (320 sq ft) | 4 posts, about 14×18 ft; or 6 posts at 9 ft | 14-ft span: 2×6 at 16 in or 2×8 at 24 in | 4×12 or 6×10 (4 posts); 4×6 (6 posts) | 18 in (4 posts) or 14 in (6 posts) | Dining for 6 plus a lounge area |
Assumptions: Escondido Guideline 8A tables for an open lattice cover (5 psf dead load, Douglas fir-larch No. 2), mild climate, no snow load. Post layout assumes a 1-ft overhang on each end, the rule kit maker Heartland Pergolas sizes its kits around. Rafter span = distance between beams; beam span = post spacing.
Read the table as a starting point, not a permit. Cities with snow, high wind, or different lumber species publish their own numbers, and spans shrink fast under snow. Ask your building department whether it has a pergola or patio cover handout like Escondido’s.
The “fits” column uses Trex Furniture’s sizing rules: a 6-seat rectangular table is at least 36×72 inches, and you want 3 feet of clearance on every side. That works out to a zone of about 9×12 feet, which fits between the posts of a 12×16 but not a 12×12.
How to check a footing size yourself
The City of Laguna Hills gives a simple rule for its detached patio cover standard: the roof area each post carries equals half the beam span times half the rafter span, plus the overhang. Then match that area to a footing:
- Up to 50 sq ft per post: 12-inch square footing.
- Up to 100 sq ft: 16-inch square.
- Up to 150 sq ft: 20-inch square.
- Up to 200 sq ft: 24-inch square.
A 4-post 12×12 puts about 36 sq ft on each post, so a 12-inch footing covers it. A 4-post 16×20 puts about 80 sq ft on each post, which is why its footings grow to 16–18 inches. Pick your footprint first; for layout inspiration by purpose, see these pergola ideas grouped by what you want the space to do.
Before you dig: permit, layout and utilities
Before you dig a single pergola post hole, settle three things: the permit, the exact layout, and what is buried under the yard. Each one is cheaper to fix on paper than in concrete.
- Permit. Many cities treat a pergola like a patio cover. Phoenix asks for a plot plan, a cross section, and a foundation plan; Escondido and Laguna Hills require a footing inspection before concrete goes in. Check with your local building department.
- Setbacks. Escondido bars patio covers from required setbacks except for allowed overhang. Laguna Hills requires a one-hour firewall when a post or wall sits within 5 feet of the property line.
- Utilities. Contact 811, the free national before-you-dig service, a few business days before you start digging.
- Budget. Price the lumber, concrete, and hardware against a kit before committing; the breakdown of what a pergola costs by size and material shows where the money goes.
How to build a pergola step by step
How to build a pergola comes down to nine steps, done in order. The sequence below is for a freestanding wood pergola on footings in the lawn; the section after it covers patios, decks, and house walls.
Step 1: Lay out and square the footprint
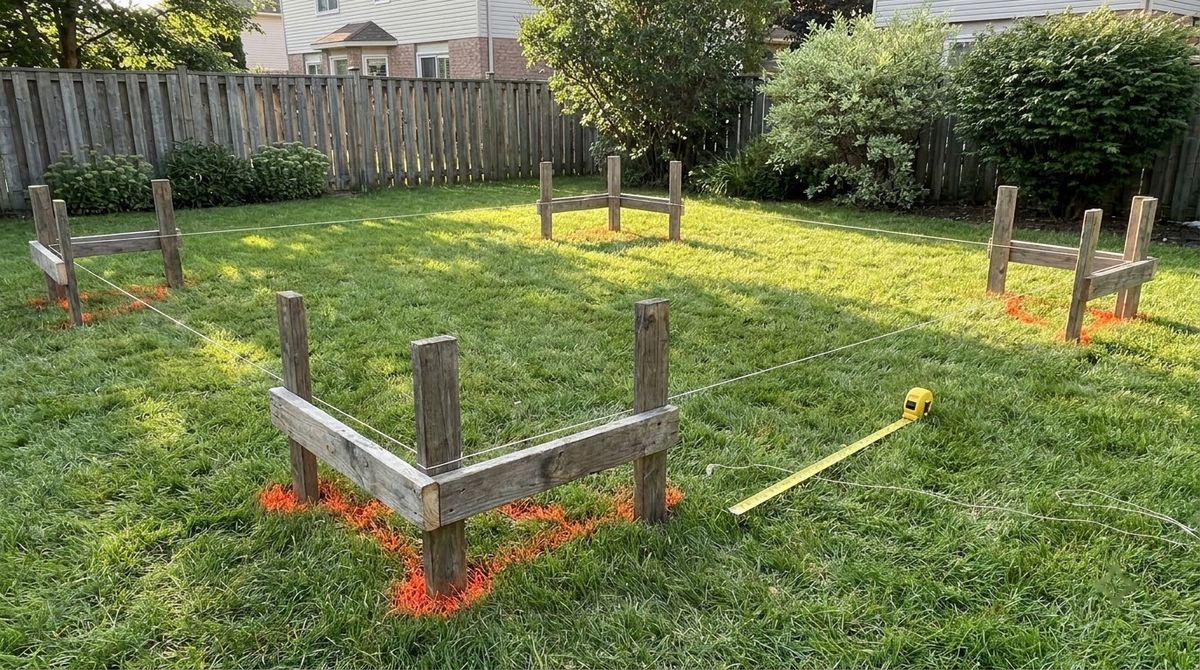
Drive batter boards a foot or two outside each corner and run mason’s string between them along the post centerlines. Square the corners with a 3-4-5 triangle: mark 3 feet on one string, 4 feet on the other, and adjust until the diagonal between the marks reads exactly 5 feet. Then check that both full diagonals match.
Step 2: Dig and pour the footings
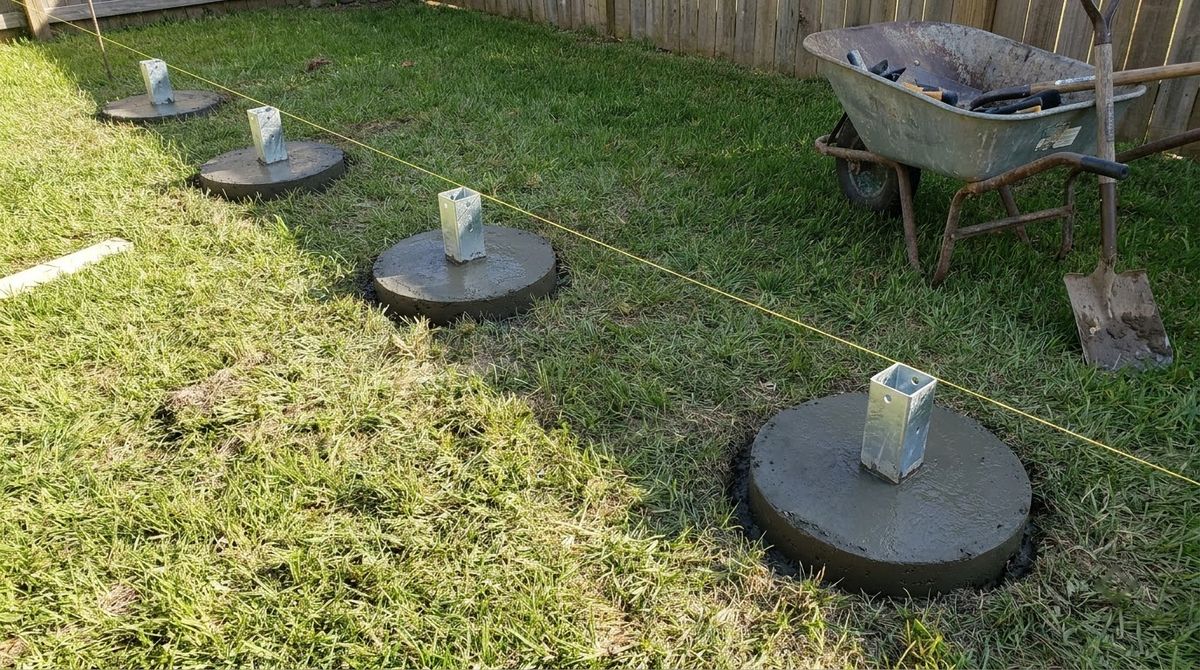
Dig each hole to the size in the table and at least 12 inches into undisturbed soil, or below the frost depth your building department publishes, whichever is deeper. Schedule the footing inspection if your permit calls for one, then pour concrete rated at 2,000–2,500 psi or more.
Step 3: Set the post bases
Set a galvanized post base in each footing while the concrete is wet, or anchor one to cured concrete later. Laguna Hills’ standard detail shows a raised post base with at least a 1-inch standoff, which keeps the post end out of standing water. Align every base to the string so the posts land on the layout.
Step 4: Stand and brace the posts
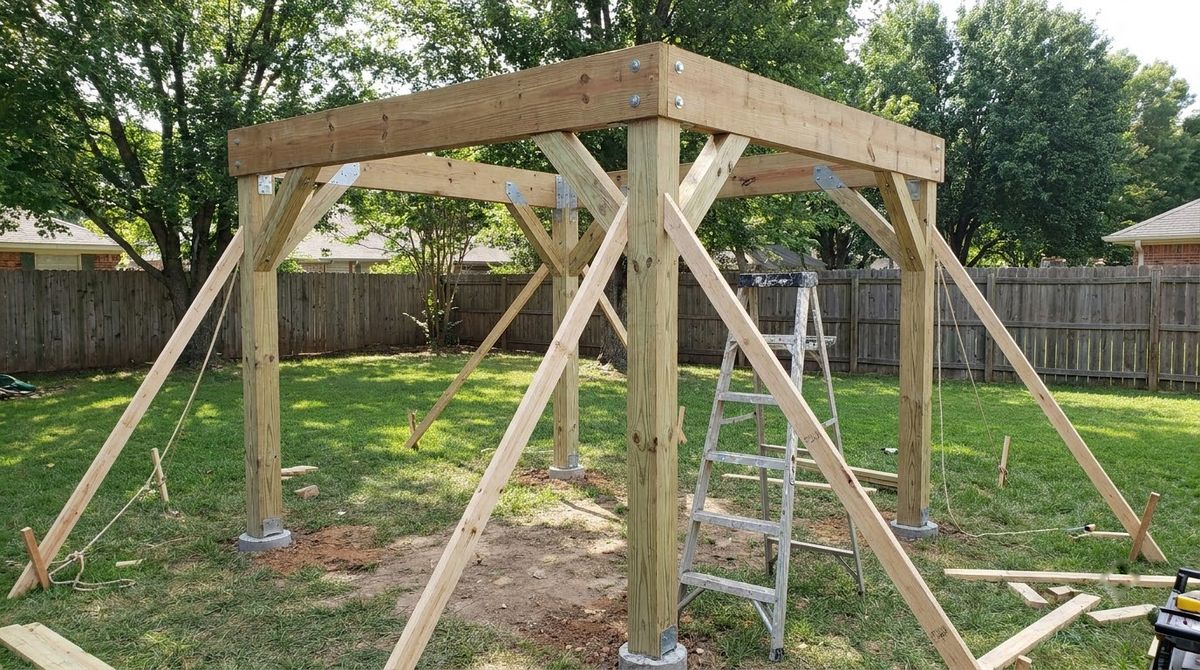
Cut the posts a little long, fasten them to the bases, and plumb each one on two adjacent faces with a 4-foot level. Hold them with two temporary diagonal braces staked to the ground. Leave the braces on until the beams and knee braces are in.
Step 5: Mark a level line and cut the post tops
Pick the height of the underside of the beam, mark it on one post, and transfer that line to the others with a laser or water level. Escondido defines a patio cover as having at least 6 feet 8 inches of clear height under the supporting members, a useful floor for headroom. Cut the tops square on the line.
Step 6: Set the beams
Lift the beams onto the posts and connect each joint with a listed post cap or galvanized T-straps on both faces, through-bolted. The Laguna Hills detail calls for 5/8-inch bolts with nuts and washers in holes no more than 11/16 inch. Check that the beams are level and parallel before tightening.
Step 7: Add knee braces
A freestanding pergola has no house to lean on, so knee braces keep it from racking. The Laguna Hills standard shows 4×4 knee braces cut at 45 degrees and at least 24 inches long, bolted between post and beam. Brace both directions at every corner post.
Step 8: Lay out and fasten the rafters
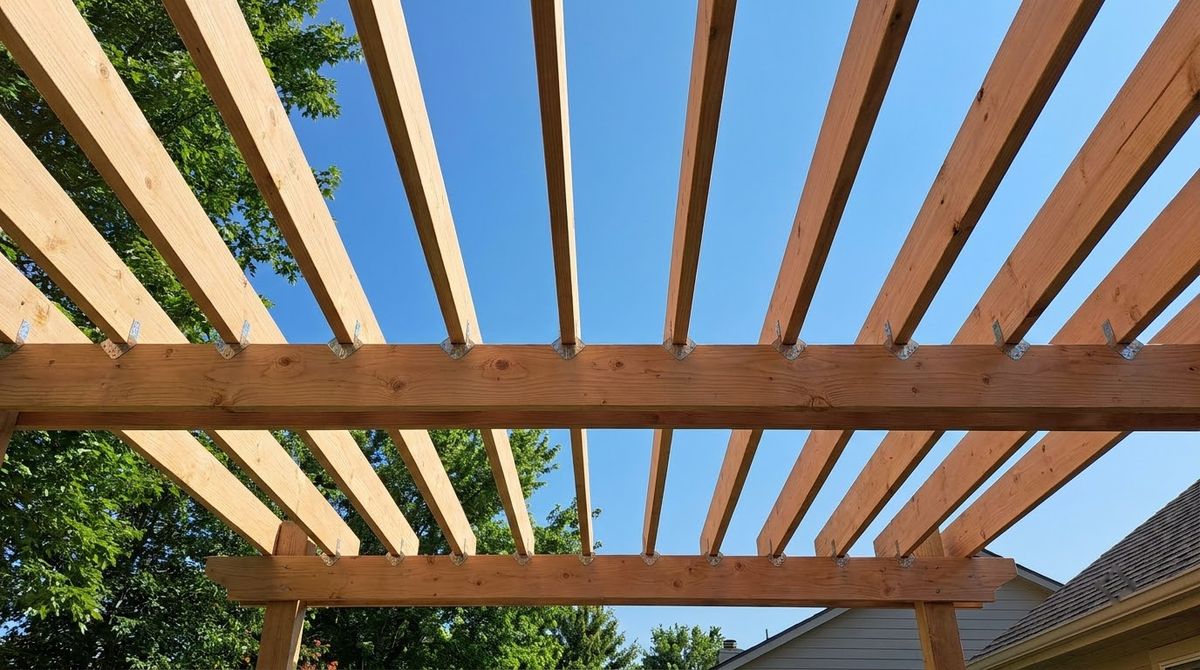
Mark rafter positions on both beams at your chosen spacing, 12, 16, or 24 inches on center, and size the rafters from the table for that spacing. Fasten each crossing with toenails plus metal framing anchors where your plan shows them; Laguna Hills calls for three 8d toenails at each rafter-to-beam joint.
Step 9: Add top slats and finish
Lay slats across the rafters for extra shade. Escondido’s lattice standard limits slats to 2×4 nominal, self-spaced so the roof stays about 50% open; a solid or denser roof is a different structure with heavier loads. Seal or stain the wood to the finish maker’s schedule.
Building on a patio, a deck, or against the house
Building a pergola on an existing surface changes only the foundation step; posts, beams, and rafters stay the same.
- Existing concrete patio. Escondido and Laguna Hills both allow a 3½-inch slab to serve as the foundation when each post carries less than 750 pounds and, in Escondido, the cover is light open lattice. Bigger structures need real footings cut through the slab.
- Deck. Posts must land on structure below the boards, not on decking alone; the details are in mounting a pergola on a deck.
- House wall. One side hangs on a ledger and two posts carry the other. Water is the risk there, covered in how to attach a pergola to a house with a flashed ledger. Laguna Hills forbids relying on the house’s rafter tails without engineering.
Common mistakes when building a pergola
Most pergola failures trace back to a few avoidable mistakes:
- Sizing beams by eye. A 4-post 16×20 needs a beam three sizes deeper than a 12×12 in the Escondido table. Look it up.
- Shallow footings. Holes that stop above the frost line heave; holes that stop in loose fill settle.
- Skipping knee braces. Posts fixed only at the base let a freestanding frame rack sideways in wind.
- Using snow-free spans in snow country. The table assumes a mild climate; heavier loads mean bigger lumber.
- Lag screws where bolts belong. Beam-to-post joints get through-bolts or listed connectors.
- Forgetting uplift. Laguna Hills requires post-to-slab connectors that resist uplift and wind, not just gravity.
Safety while you build a pergola
Safety on a pergola build mostly means managing heavy lumber overhead and what is underground.
- Lift beams with a helper and set them in post caps or on temporary cleats before letting go.
- Brace posts before climbing ladders that lean on them.
- Wear eye and hearing protection for cutting, and gloves for handling treated lumber and wet concrete.
- Never dig before the 811 marks are in. Hand-dig near any flagged line.
When not to build it yourself
A DIY pergola is reasonable for an open, freestanding wood frame within your city’s standard plan. Hire a builder or engineer when the project falls outside that box:
- The footprint or spans go past your local table, or you live where snow loads are heavy.
- You want a solid, louvered, or tile roof. Laguna Hills requires an engineer for heavy roofs such as tile or stucco.
- The pergola ties into a roof, brick, or stucco wall.
- The site is a slope, a hillside lot, or a floodplain; Phoenix sends those through extra reviews.
Frequently asked questions
Do you need a permit to build a pergola?
Often, yes. Many cities treat a pergola like a patio cover and ask for a site plan and framing details. Phoenix wants a plot plan, cross section, and foundation plan, while Escondido and Laguna Hills require a footing inspection before concrete is poured. Rules vary by city and by size, so check with your local building department first.
How deep should pergola post holes be?
At least 12 inches into undisturbed soil, the minimum in IRC R403.1.4 as Phoenix quotes it, and deeper than your local frost depth wherever the ground freezes. Width matters too: Escondido’s table calls for 12-inch square footings on small pergolas and up to 18 inches on a 4-post 16×20. Your building department sets the final number.
Should pergola posts be 4×4 or 6×6?
City standard plans such as Laguna Hills’ accept 4×4 posts as a minimum for patio covers. For a freestanding pergola, 6×6 posts are worth the upgrade: they take through-bolts and knee braces without crowding the wood, and they look in proportion with deeper beams. Check what your permit drawings or kit instructions specify.
How far can a pergola span without a post?
It depends on the beam. In Escondido’s table, with rafters spanning 10 feet, a 4×6 beam covers posts up to 10 feet apart, a 4×8 reaches 14 feet, and 16 feet takes a 4×10. That table assumes a mild climate, so use your local span table where snow falls.
Can you build a pergola on an existing concrete patio?
Sometimes. Escondido and Laguna Hills both let a 3½-inch slab act as the foundation when each post carries under 750 pounds, and Escondido limits that to light, open lattice covers. Larger or heavier pergolas need footings cut through the slab. Anchor every post base to resist uplift, not just weight.
Sources
- City of Escondido Building Division, Information Guideline 8A: Lattice Patio Cover (January 2014).
- City of Laguna Hills Building Division, Detached Patio Cover standard plan (checked October 2026).
- City of Phoenix Planning & Development, Residential Patio Covers Guideline (rev. 08/26).
- Common Ground Alliance, 811 Before You Dig (checked October 2026).
- Trex Furniture, The Ultimate Patio Table Size Guide (updated August 2025).
- Heartland Pergolas, Pergola Installation Guide (2021).