Paver patio installation tools fall into seven phases, and only two big machines are worth renting: a vibrating plate compactor, which CMHA says should deliver at least 5,000 lbf of force when you compact the pavers, and a masonry saw that cuts wet. Everything else is a hand tool you may already own or can buy once and reuse.
Key takeaways
- Rent the compactor by its force, not its weight. Sunbelt’s 200 lb class plate makes about 3,350 lbf; its 300 lb reversible class makes 6,070 to 6,750 lbf.
- Cut pavers wet or with a splitter. OSHA’s silica rule for construction requires saws with water fed continuously to the blade.
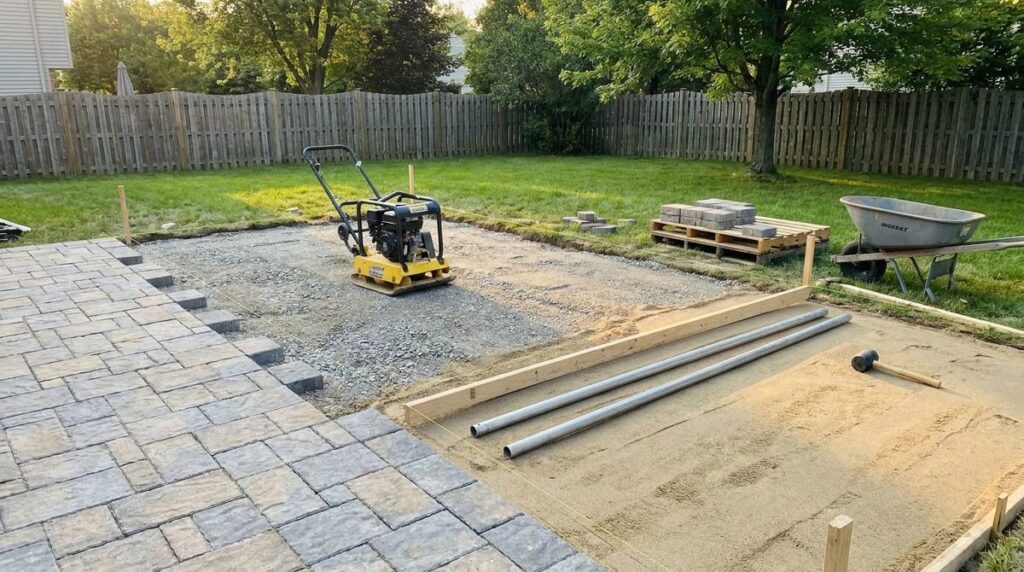
- Screeding needs no special tool: a straight 8- to 10-foot 2×4 and two 1-inch pipes, per Rochester Concrete Products.
- Pad the compactor on the pavers. Rochester says to use a protective pad on large or raised-surface pavers to prevent scuffing.
- Call 811 a few business days before digging. It is free.
Here are the tools for each phase of a paver patio, and whether to buy, rent or skip each one.
| Phase | Tools | Buy, rent or skip |
|---|---|---|
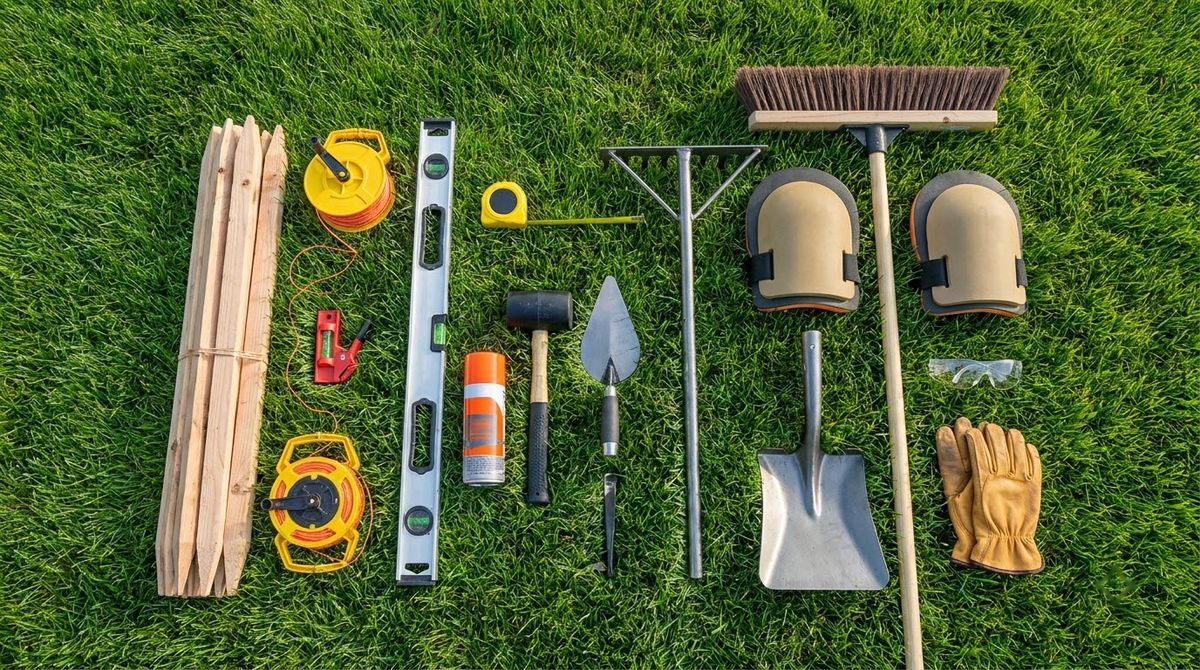
| Layout | Wooden stakes, string, string level, marking paint, tape measure, carpenter’s level | Buy; all cheap and reusable |
| Excavation | Shovels, gravel rake, wheelbarrow, pickaxe for hard ground | Buy or borrow |
| Base compaction | Vibrating plate compactor, hand tamper, 10-ft straightedge | Rent the compactor; buy the tamper |
| Screeding | Straight 8–10 ft 2×4, two 10-ft 1-in pipes or conduit, trowel | Buy; skip a power screed |
| Laying and cutting | Rubber mallet, chalk line, masonry saw with diamond blade or a paver splitter, knee pads | Rent the saw or splitter |
| Edge restraint | Paver edging, spikes, hammer or small sledge | Buy (the edging is a material) |
| Joint sand | Push broom, leaf blower, garden hose with shower nozzle, plate compactor with pad | Buy; reuse the rented compactor |
Paver patio installation tools by phase
Paver patio installation tools are easiest to plan by phase, because each phase needs its tools on site on a different day. Rochester Concrete Products’ installation guide gives the core list; CMHA, the hardscape industry body formerly known as ICPI, adds the straightedge and splitter.
Layout and excavation
- Stakes, string and a string level set the finished height and slope; CMHA says to check grade stakes periodically so they have not been knocked.
- Marking paint and a tape measure outline the patio; Rochester squares the first corner with a three-four-five string triangle.
- Shovels, a gravel rake and a wheelbarrow do the digging. Add a pick or mattock if you hit hardpan.
Base, screeding and edges
- Plate compactor plus hand tamper. Rochester lists both; the tamper reaches corners and edges where the plate will not fit.
- A 10-foot straightedge. CMHA’s tolerance is plus or minus 3/8 inch under it, so a straight 2×4 of that length doubles as a checking tool.
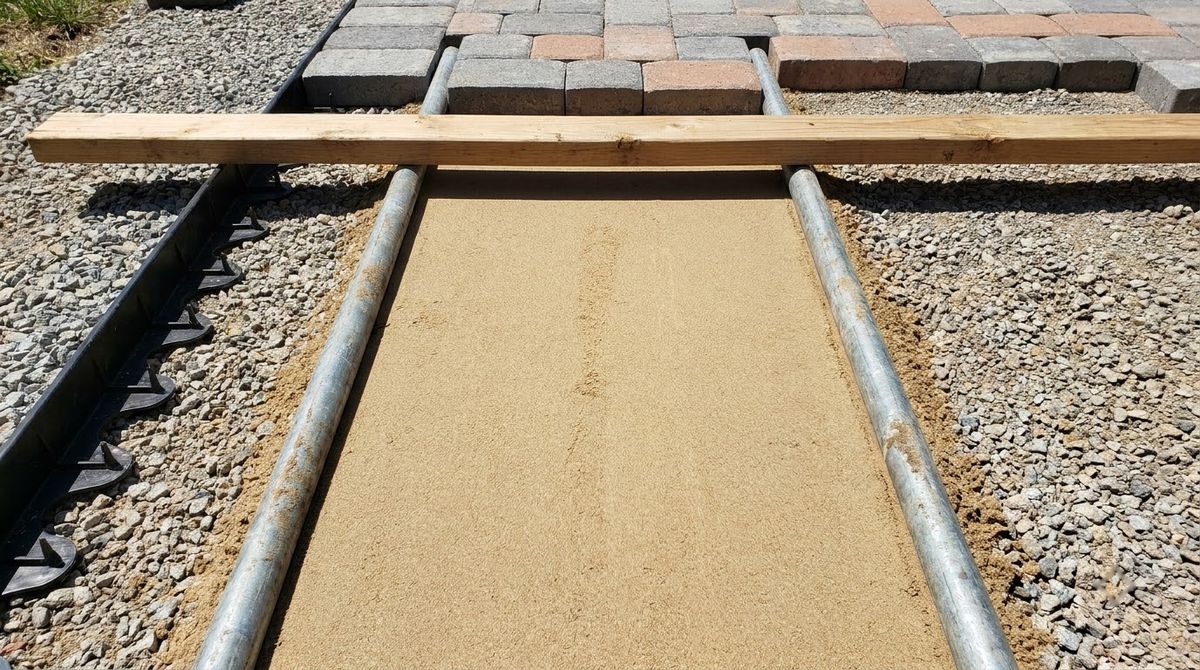
- Screed board and rails. Rochester uses an 8- to 10-foot straight 2×4 pulled over two 10-foot, 1-inch pipes, electrical conduit or wood strips.
- Edge restraint and spikes, driven with a hammer or small sledge into the compacted base.
Laying, cutting and joint sand
- Rubber mallet and string or chalk lines keep joints straight; CMHA warns that buildings are rarely straight enough to align rows against.
- Saw or splitter for the edge pieces (next sections).
- Broom, leaf blower and hose. Rochester sweeps polymeric sand in with a fine-bristle broom or leaf blower and wets it with a hose on the shower setting.
Plate compactor: what size to rent
The plate compactor is the one paver patio tool where size really matters, because the force it delivers sets how thick each gravel lift can be. CMHA compacts base in 4- to 6-inch lifts with a 7,000 lbf reversible plate and calls for thinner lifts with compactors in the 5,000 lbf range.
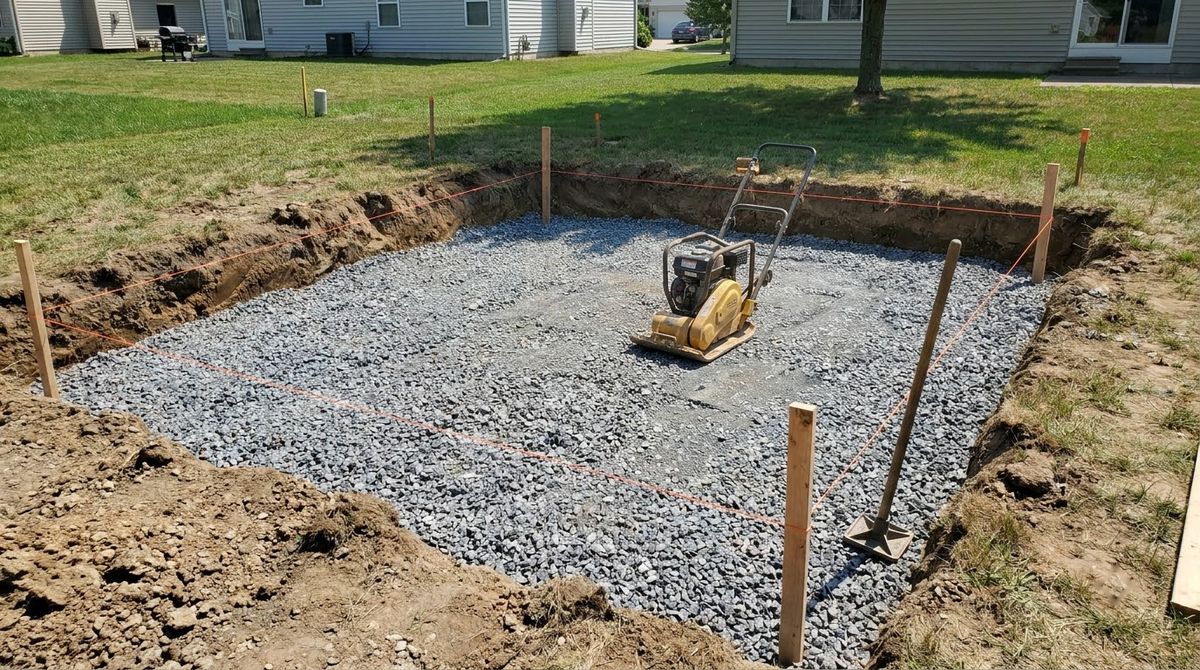
Rental counters name compactors by weight, so ask for the centrifugal force on the spec sheet. Sunbelt Rentals’ current listings show the spread:
- 14-inch, 140 lb class: one-way, described for small jobs and patio construction in narrow areas; no force listed.
- 20-inch, 200 lb class: one-way, about 3,350 to 3,375 lbf, also aimed at patio work in tight spaces.
- 18-inch, 300 lb class reversible: 6,070 to 6,750 lbf, forward and reverse.
- 20-inch, 450 lb class reversible: 7,870 to 8,318 lbf, depending on the model.
A light one-way plate still compacts gravel, in thinner lifts. For the pavers, CMHA calls for at least 5,000 lbf at 75 to 90 hertz and at least two passes, which rules out the lightest classes. Lift thickness by machine and depth by soil are covered in the patio paver base depths and compaction guide.
Cutting pavers: saw or splitter
Cutting pavers is done with either a masonry saw or a splitter, and CMHA accepts both: a double-bladed splitter or a masonry saw, with the saw giving the smoother cut. Rochester calls for a concrete saw with a diamond blade, “available at rental stores,” or a guillotine splitter.
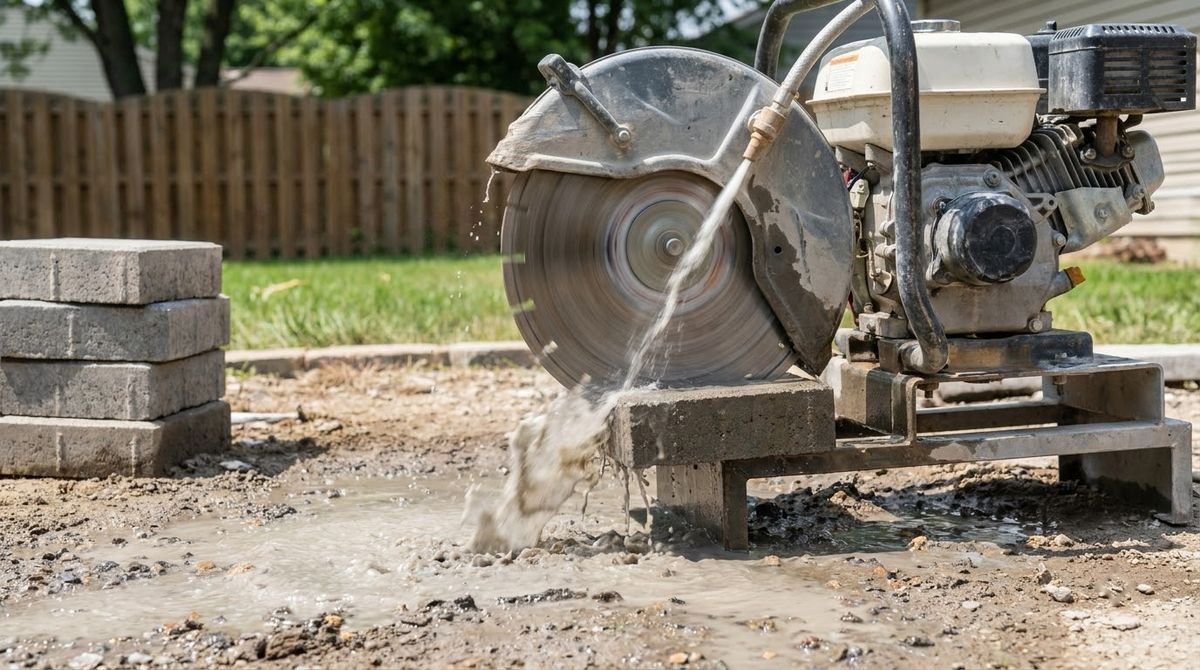
- Splitter: no blade, water or engine, but a rougher edge. Suits straight cuts on a square patio.
- Saw: the better choice for curves, angled herringbone edges and clean visible cuts.
- How much to cut. CMHA fills any gap wider than 3/8 inch with a cut paver, so most edges along a soldier course need cuts.
- Cut one at a time. Rochester marks, removes, cuts and places each paver before moving to the next.
Rent, buy or skip
Rent, buy or skip comes down to how often you will use a tool again. Machines you need for a day or two get rented; hand tools you will reuse on later projects get bought; specialty pro tools get skipped on a single patio.
- Rent: the plate compactor and the masonry saw or splitter. Book them for the base days and the laying days, which may not be the same weekend.
- Buy: stakes, string, level, mallet, rake, broom, screed pipes and a hand tamper. A straight 2×4 is the screed board.
- Skip: powered screeding machines, which CMHA describes for larger installations, plus paver carts and other pro conveniences a single patio does not need.
Rental rates vary by store and region; Home Depot’s rental pages blocked automated checks and Sunbelt prices by location, so no price is quoted here. Day rates for a compactor and wet saw, and what they add to a DIY budget, are in the paver patio cost per square foot breakdown.
Step outline: which tools come out when
The step outline below shows which tools come out when. Depths, gravel types and slope figures live in the base guide, so they are not repeated here.
Step 1: Mark the patio and call 811
Paint the outline, set stakes outside it, and run string at finished height and slope. Contact 811 a few business days before digging, and wait until every utility has marked its lines.
Step 2: Excavate
Dig with shovels and a pickaxe where needed, measuring down from the strings. Haul soil in the wheelbarrow and rake the bottom roughly flat.
Step 3: Compact the soil and the base
Run the plate compactor over the soil, then spread gravel in lifts and compact each one. Use the hand tamper in corners. Check with the straightedge and fix dips with gravel, not sand.
Step 4: Set edge restraints
Rochester installs edging on the compacted base along one or two sides first, then adds the rest after the pavers are down to avoid extra cutting.
Step 5: Screed the bedding sand
Lay the two pipes on the base, fill with sand, and pull the 2×4 across them. Remove the pipes, fill the grooves with a trowel, and stay off the screeded sand.
Step 6: Lay and cut pavers
Lay from a square corner, tap with the rubber mallet, and keep lines straight with string. Cut edge pieces with the saw or splitter as you go.
Step 7: Compact the pavers
Sweep the surface, fit the pad, and run the compactor in parallel overlapping passes, then a second series at a right angle, as Rochester describes.
Step 8: Fill the joints
Sweep dry joint sand in and compact again; CMHA says this may take two or three passes. For polymeric sand, Rochester clears excess with a broom or blower, wets 200 sq ft at a time for 30 seconds, and keeps water off for 24 hours.
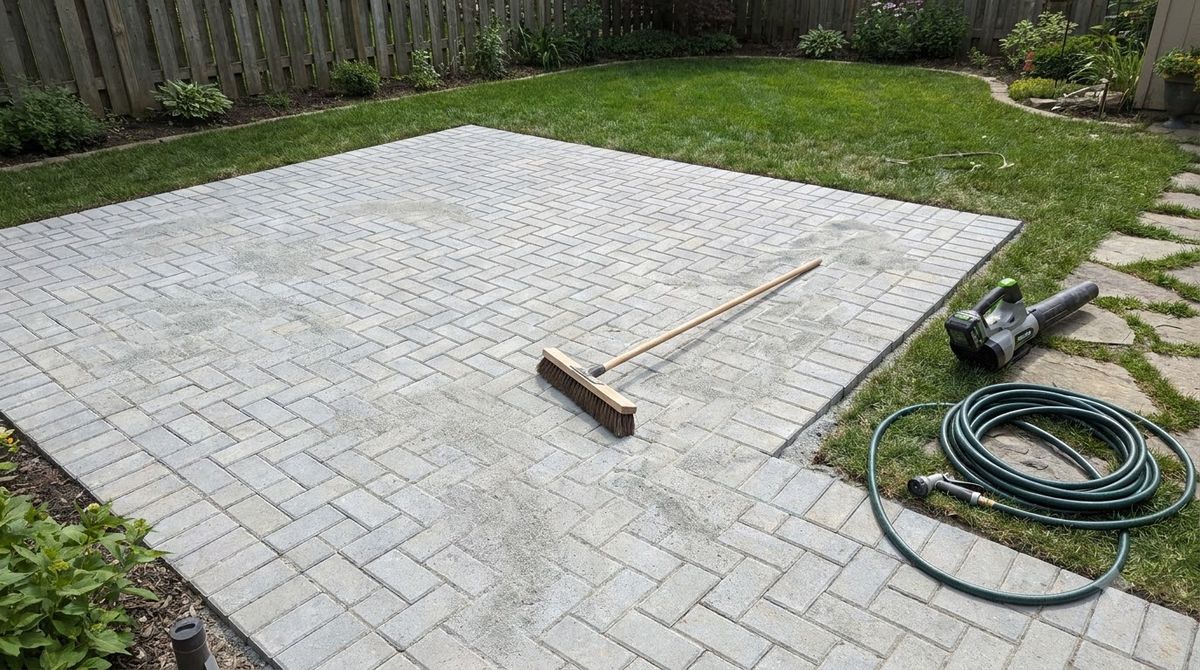
Plate compactor and saw safety
Plate compactor and saw safety centers on three hazards: silica dust from cutting, exhaust from gas engines, and noise and vibration. OSHA’s rules below are written for employers, but they are the clearest benchmark for anyone running the same tools at home.
Silica dust from cutting pavers
Concrete and stone pavers contain crystalline silica. OSHA says breathing the respirable dust causes silicosis, an incurable lung disease, along with lung cancer, COPD and kidney disease. CMHA says all saws used on pavers should have equipment to reduce dust.
- Water on the blade. Table 1 of 29 CFR 1926.1153 requires stationary masonry saws, handheld saws and walk-behind saws to have an integrated system feeding water continuously to the blade.
- Respirators. With that water, a stationary or walk-behind saw outdoors needs no respirator; a handheld saw outdoors needs one with an assigned protection factor of 10 beyond 4 hours a shift.
- Exposure limit. OSHA’s limit is 50 micrograms per cubic meter averaged over 8 hours.
- Clean-up. The standard restricts dry sweeping and compressed air for silica dust; wet the slurry and hose it off instead.
Exhaust, noise and lifting
- Carbon monoxide. OSHA names the internal combustion engine as one of the most common sources of CO exposure and advises against gas engines in poorly ventilated areas, such as a courtyard closed in on three sides.
- PPE. Sunbelt lists eye protection, hearing protection, gloves and safety shoes for its plate compactors; Rochester adds safety glasses whenever you cut.
- Weight. Rental plates weigh about 140 to 529 pounds on Sunbelt’s spec sheets, so load and unload them with a ramp and a second person.
Tool mistakes to avoid on a paver patio
Most tool mistakes on a paver patio come from using the right tool at the wrong moment:
- Renting the lightest plate and compacting a thick lift in one go.
- Running the compactor on pavers with no pad, which scuffs large or raised-surface faces.
- Dry-cutting with a saw that has no water feed, filling the yard with silica dust.
- Screeding with a warped board, which leaves humps that show through.
- Aligning rows to the house wall instead of a string line.
- Watering polymeric sand with a jet nozzle, washing it out of the joints.
For patterns and layouts that change how much cutting you face, see these paver patio ideas by pattern and size. A herringbone needs far more angled cuts than a running bond.
Frequently asked questions
What tools are needed to install a paver patio?
Stakes, string, a level and marking paint for layout; shovels, a rake and a wheelbarrow to dig; a plate compactor and hand tamper for the base; a 2×4 and two 1-inch pipes to screed sand; a rubber mallet, a masonry saw or splitter, edge restraint, a broom and a hose to finish. Rent the compactor and saw.
Can I use a hand tamper instead of a plate compactor?
Only for corners, edges and very small areas. Rochester Concrete Products lists a plate compactor and a hand tamper together, and CMHA calls for a vibrating plate of at least 5,000 lbf to seat the pavers in the sand. A hand tamper cannot vibrate pavers down or work joint sand into the joints evenly.
What size plate compactor should I rent for pavers?
Ask for the centrifugal force, not the weight. CMHA calls for at least 5,000 lbf to compact pavers and uses 7,000 lbf reversible plates for 4- to 6-inch gravel lifts. On Sunbelt’s spec sheets a 200 lb class plate makes about 3,350 lbf, while its 300 lb reversible class makes 6,070 to 6,750 lbf.
Do I need a wet saw to cut pavers?
You need a saw that cuts wet, or a splitter. CMHA accepts a double-bladed splitter or a masonry saw. OSHA’s construction silica standard requires masonry, handheld and walk-behind saws to have water fed continuously to the blade, because dry cutting concrete and stone releases respirable crystalline silica, which causes incurable silicosis.
Should I rent or buy paver tools?
Rent the plate compactor and the saw or splitter, which a single patio needs for a few days at most. Buy the hand tools: stakes, string, level, rubber mallet, rake, broom, hand tamper and screed pipes, which cost little and get reused. Skip power screeds and paver carts, which are built for large professional jobs.
Sources
- Concrete Masonry & Hardscapes Association (formerly ICPI), Construction of Interlocking Concrete Pavements, PAV-TEC-002 (revised 2022).
- Rochester Concrete Products, Paver Installation Guide (2018).
- U.S. Occupational Safety and Health Administration, 29 CFR 1926.1153 Respirable crystalline silica, Table 1 (checked October 2026).
- U.S. Occupational Safety and Health Administration, Silica, Crystalline: Health Effects (checked October 2026).
- Sunbelt Rentals, 18" Reversible Plate Compactor, 300 lb class and sibling plate compactor spec pages (checked October 2026).
- Common Ground Alliance, 811 Before You Dig (checked October 2026).